Some users are encountering the Could Not Create The Java Virtual Machine error when trying to launch an application that is using Java. This particular issue is reported to occur with Minecraft and several other applications that are built around Java.
Đang xem: Phần mềm sửa lỗi đang tải thư viện chỉ bằng vài click chuột nhanh nhất
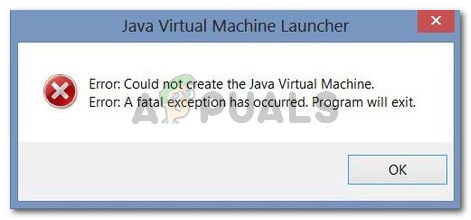
Could not create the Java Virtual Machine.Error: A fatal exception has occurred. The program will exit.
What is causing the Could Not Create The Java Virtual Machine error?
We investigated this particular issue by looking at various user reports and the troubleshooting strategies that they used to resolve the same error message. Based on their conclusions, there are a couple of scenarios that will trigger this particular issue:
Java is invoked by the wrong arguments or options – This can occur if you’re running a home-brewed application or you’re trying to open an open-source application that is known to cause system instability.Java global maximum heap memory is not high enough – One of the most common causes of why you can encounter this particular error is if you try to start a Java application with a maximum heap memory size larger than the one set as the System Variable.Java executable and/or application require administrative privileges – This might happen with applications that need admin access in order to function properly.
If you’re currently looking for a way to resolve the, Could Not Create The Java Virtual Machine error, this article will provide you with several verified troubleshooting strategies. Below you have a collection of methods that other users in a similar situation have used to get the issue resolved.
To ensure the best results, follow the methods below in the order that they are presented until you discover a method that is effective in resolving the error for your particular scenario.
Method 1: Adding the _JAVA_OPTIONS to System Variables
Most affected users have managed to get the issue resolved by creating a System Variable for Java called _JAVA_OPTIONS and setting it’s value to Xmx512M. What this essentially does is it sets the global maximum heap memory size for Java.
This will resolve any error message that occurs because the started Java application’s maximum heap memory size is larger than the one set as the System Variable. Several users encountering the same issue have reported that the issue was resolved entirely after they performed the steps below.
Here’s what you need to do to add a _JAVA_OPTIONS entry in System Variables to enlarge the global maximum heap memory size:
Press Windows key + R to open up a Run dialog box. Then, type “sysdm.cpl” and press Enter to open up the System Properties screen.Inside the System Properties screen, go to the Advanced tab and click on Environment Variables.In the Environment Variables window, click on New (under System Variables).Inside the New System Variable window, set the Variable name to _JAVA_OPTIONS and the Variable value to –Xmx512M and click Ok to save the changes.Close the previously opened windows and restart your machine to enforce the changes.At the next startup, open the application that was previously showing you the Could Not Create the Java Virtual Machine error and see if is now functioning properly.

Creating a System Variable called _JAVA_OPTIONS and assigning it the value Xmx512M
If you’re still seeing the same error message at the start of the application, try adding the Java Bin path which might be similar to “%USER PATHJavajdk1.6.0_39in” to the environment variable as indicated in the above method and see if that works.
Xem thêm: Phần Mềm Chuyển Đổi File Ảnh Sang Word, Download Chuyển Đổi File Ảnh Sang Word
Method 2: Opening java.exe with admin rights
Several users struggling to resolve the same issue have managed to get the issue resolved after forcing the main Java executable (java.exe) to open with administrative privileges.
Some users reported that they were able to resolve the issue after applying this fix on both the main java executable and the executable of the application that is showing the error message.
Here’s a quick guide through the whole thing:
Open File Explorer and navigate to the location of your java installation. We’ll need to arrive at the location of the main Java executable (java.exe). By default, you should find it in Program Files/Java/*JRE build version*/bin. The exact location will differ depending on which Java Runtime Environment you’re using.
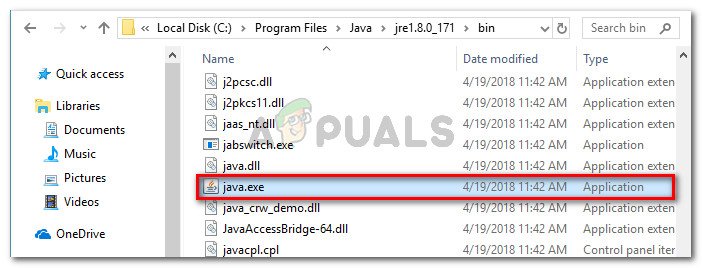
Navigate to the location of java.exe
Note: If you installed Java in a custom location, navigate the custom location instead.Right-click on java.exe and choose Properties. Then, go to the Compatibility tab and check the box associated with Run this program as an administrator (under Settings). Click Apply to save the changes.
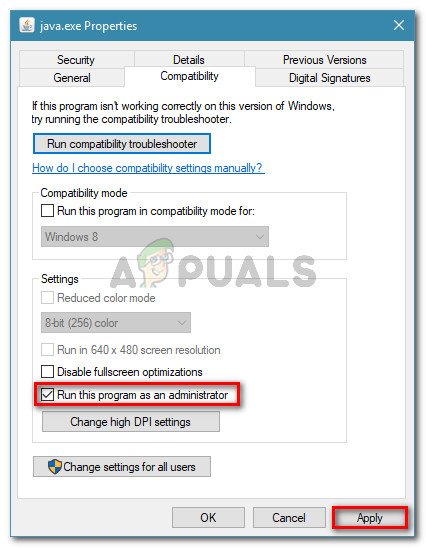
go to the Compatibility tab and enable Run this program as an administratorRight-click on the application executable (the one that is triggering the error) and repeat the same procedure: Compatibility > Run this program as an administrator > Apply.Run the application and see if the error message is resolved.
Method 3: Reinstalling Java
In some cases, the error is triggered because Java might not be installed properly or its installation might have been corrupted over time. Therefore, in this step, we will be reinstalling Java after uninstalling it completely. For that:
Press Windows key + R to open up the Run prompt and type in “Appwiz.cpl”.Type “appwiz.cpl” into the Run dialog and press EnterPress “Enter” and the Programs and Features screen will open up.At the Programs and Features screen, scroll through the installed application list until you find Java.Checking the Programs and features screenRight-click on it and select “Uninstall” to remove it completely from the systemFirst, delete the primary Java installation and later you should also remove all other Java installations such as updates and other versions.After uninstalling all installation, restart your computer.Check to see if the issue persists.Verify if the issue still exists.
Method 4: Fixing Errors With Code
There are different reasons behind this error and some of them include if you have some particular errors with your code. We will highlight some below.
Remove Hyphen: Some users noted that the error was fixed by changing the double hyphen “–” to a single one “-” in their code. For example: Change the code “sony
sony-VPCEH25EN:~$ java –version Picked up JAVA_TOOL_OPTIONS: -javaagent:/usr/share/java/jayatanaag.jar Unrecognized option: –version Error: Could not create the Java Virtual Machine. Error: A fatal exception has occurred. Program will exit.” To “sony
sony-VPCEH25EN:~$ java -version Picked up JAVA_TOOL_OPTIONS: -javaagent:/usr/share/java/jayatanaag.jar Unrecognized option: –version Error: Could not create the Java Virtual Machine. Error: A fatal exception has occurred. Program will exit.”Also, Try removing the following line from your argument -Djava.endorsed.dirs=”C:Program FilesApache Software FoundationTomcat 8.5endorsed”Open your eclipse.ini file and make sure that you add the “-vm” entry above the vm args otherwise, JVM V6 will be selected in env vars.If on Ubuntu, you should know that Java 8 is the only version that is supported. Therefore, using the third method. Uninstall Java, and install the previous version.
Method 5: Editing Eclipse.ini File
We can also tweak things inside the Eclipes.ini File to get rid of this issue. There might be a couple of issues with its configuration that need to be addressed therefore, we have divided it into separate issues. Follow the one which suits your scenario the best.
Lowering Memory Use
Open the Eclipse.ini file inside the Eclipse folder with notepad.Find the line similar to “-Xmx256m” (It might be -Xmx1024m or -Xmx 512m).Now change the default value to a more reasonable figure depending upon the RAM installed on your computer and add the version number to it as well. For Example:
-Xmx512m-Dosgi.requiredJavaVersion=1.6OR-Xmx512m-Dosgi.requiredJavaVersion=1.7OR-Xmx512m-Dosgi.requiredJavaVersion=1.8Also, try removing the “256m” value from the “-launcher.XXMaxPermSize” line.Check to see if the issue persists.
Tinkering Around
Try to remove the following lines from your file.-vm P:Programsjdk1.6inAlso, change the following lines.set -Dosgi.requiredJavaVersion=1.5TOset -Dosgi.requiredJavaVersion=1.6Also, try adding the following line above “-vmargs!” line.-vm C:Program Files (x86)Javajre6injavaw.exeAlso, point to JVM.dll using the following line.-vmC:Program FilesJavajre7inclientjvm.dllOpen the Eclipse file and replace “-vmargs” with the path of javaw.exe. For Example:-startupplugins/org.eclipse.equinox.launcher_1.3.0.v20120522-1813.jar–launcher.libraryplugins/org.eclipse.equinox.launcher.win32.win32.x86_1.1.200.v20120522-1813-productcom.android.ide.eclipse.adt.package.product–launcher.XXMaxPermSize256M-showsplashcom.android.ide.eclipse.adt.package.product–launcher.XXMaxPermSize256m–launcher.defaultActionopenFile**-vm “c:Program FilesJavajdk1.7.0_07injavaw.exe”** -Dosgi.requiredJavaVersion=1.6-Xms40m-Xmx768m-Declipse.buildId=v21.1.0-569685Also, you can place the following line at the end and check if that works.-vmargs-Xms40m-Xmx512m-XX:MaxPermSize=256mFurthermore, try removing the following lines from the eclipse.ini and check if that works.-XX:+UseStringDeduplication-XX:+UseG1GCYou can also try removing the eclipse.ini file if the issue still persists as that has reportedly fixed the issue for some but remember to back it up first just in case you need it. Also, try closing all the power-hungry applications before starting Java to make sure proper resources are available.
Xem thêm: Cách Chơi Mortal Kombat X – Character Overview #Huongdan #Scorpion
Checking for JDK Corruption
Press “Windows” + “R” to open the Run prompt and type in “cmd”.Type in the following command and check if that gives an error.c:> java -versionIf it does give an error, reinstall the JDK completely.